To install WordPress, you need to upload its files to the hosting and then install it from the browser. In this article you will learn exactly how to install WordPress. This guide updates and extends the instructions from the official Wordpress website. You can also use Automatic WordPress instalation which is active within Small package.
Uploading WordPress files to hosting
- Login to cPanel
- In the Files section, select "File manager".

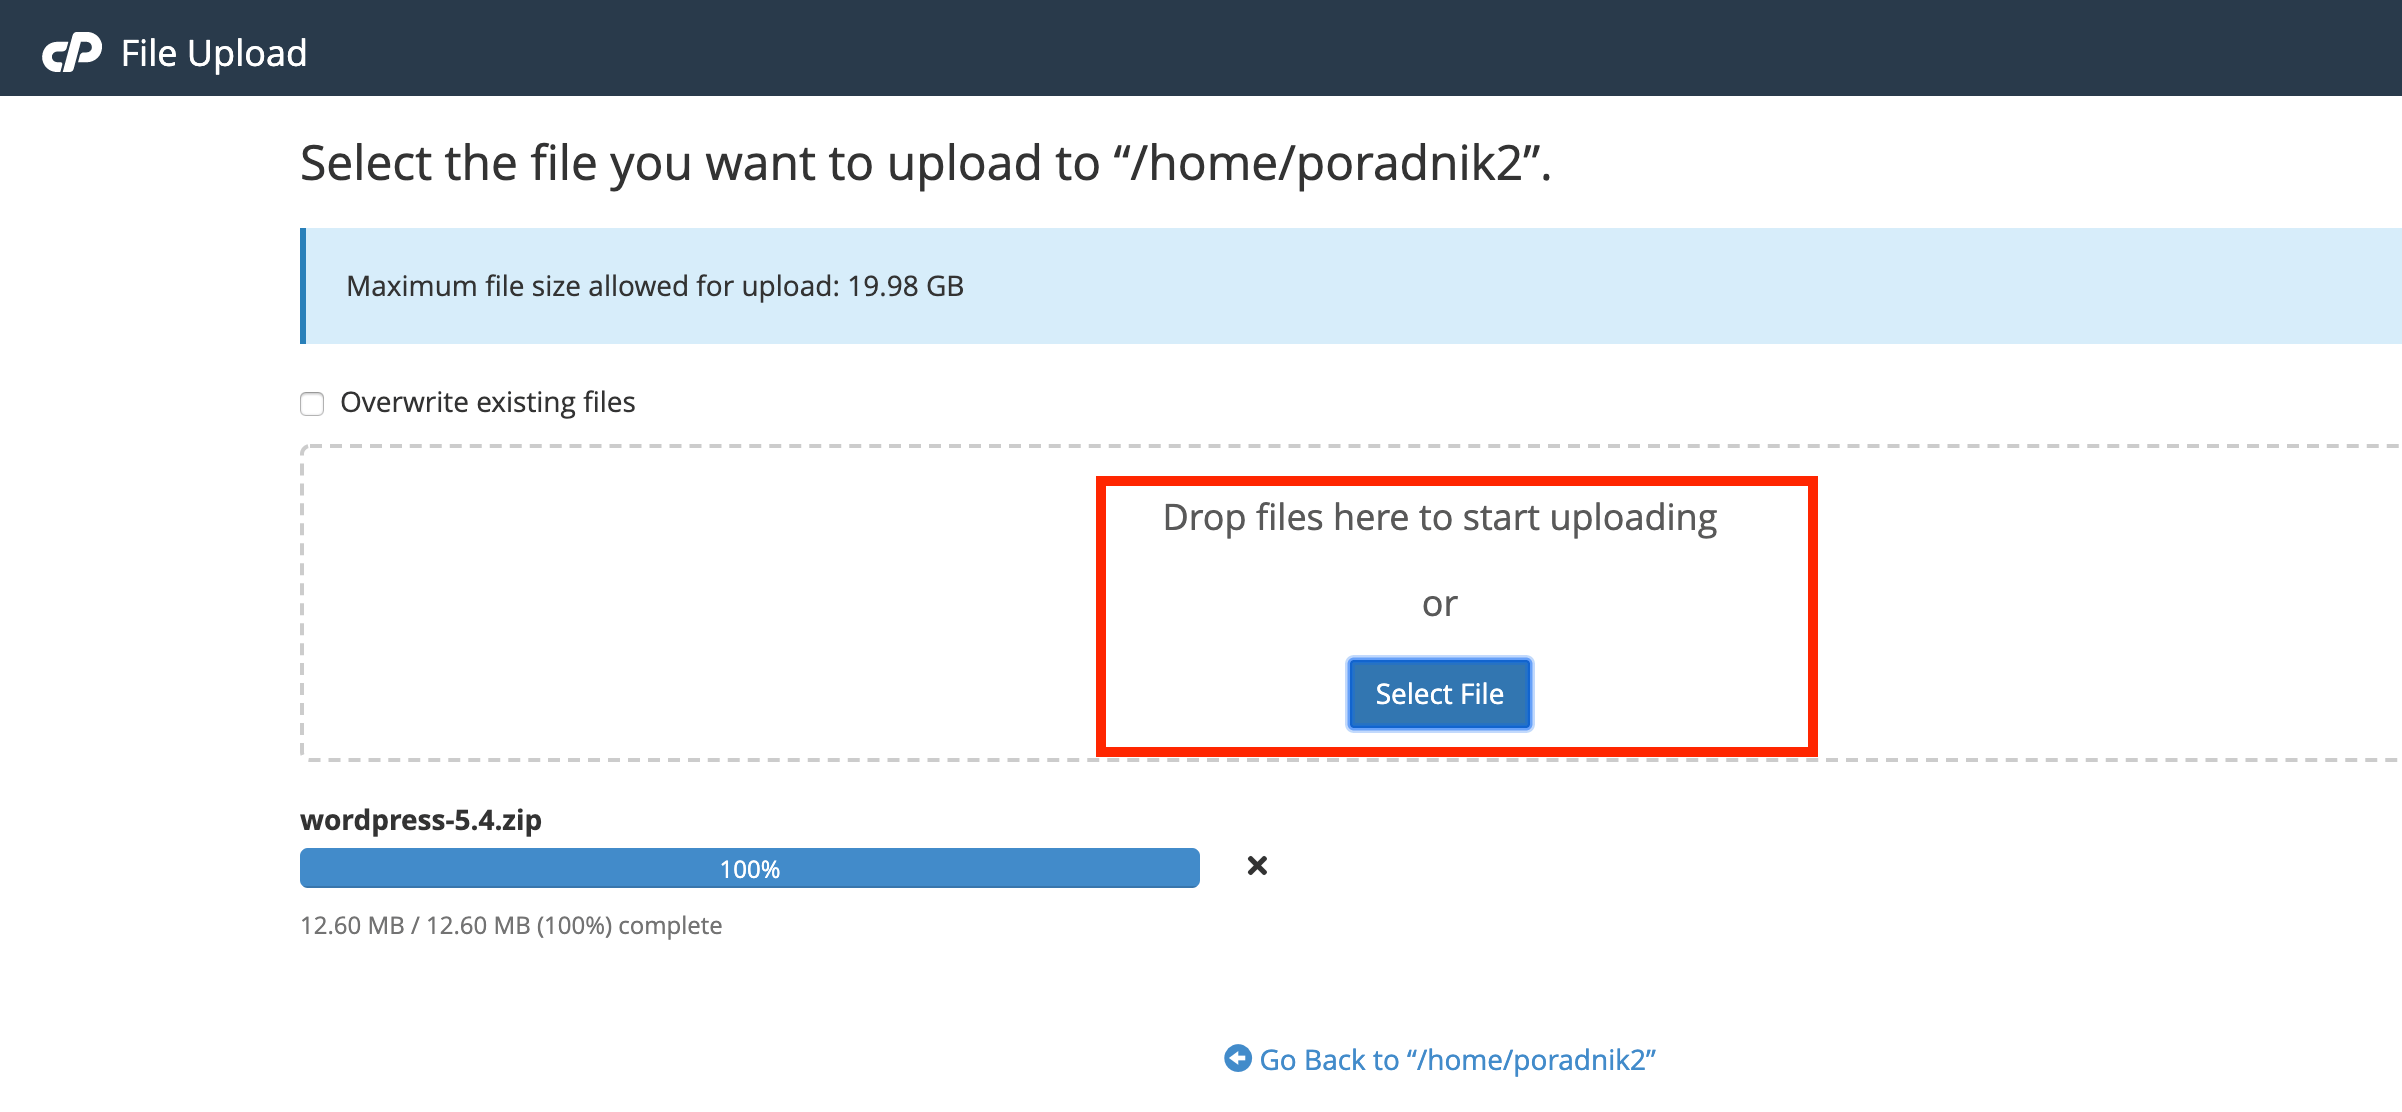
- In a separate tab download the latest version of Wordpress to your computer. Go to the domain directory, where you want to install Wordpress. Then click "Upload".

- Upload the file by clicking on "Select a file" and find the downloaded package on your computer.
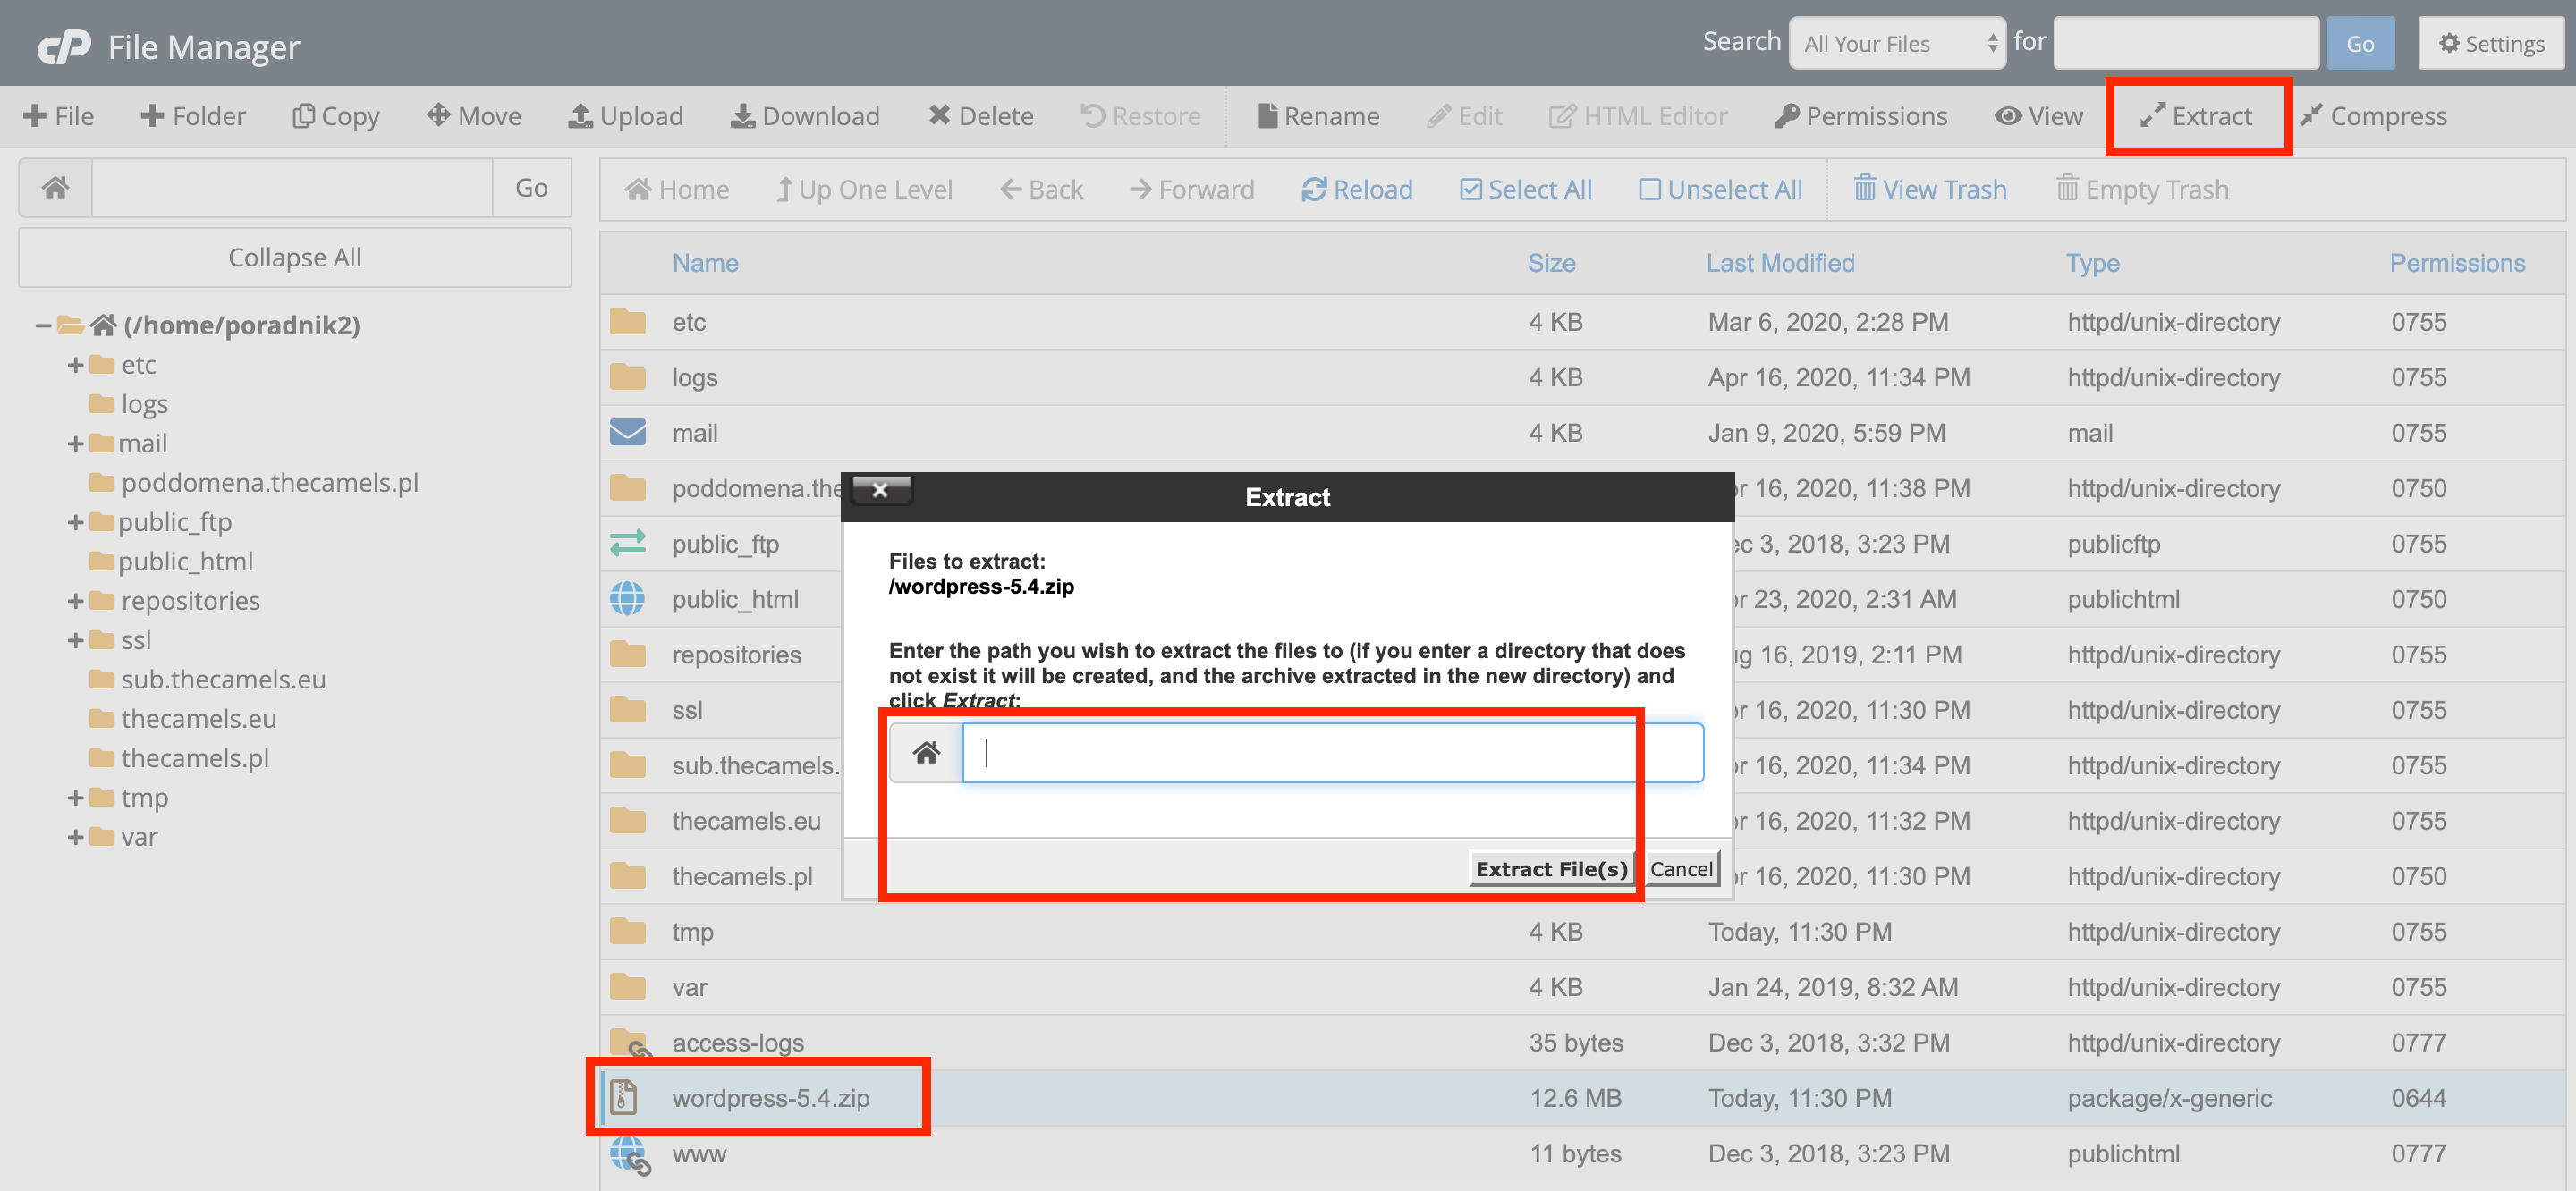
- Select your WordPress package, click on "Extract" at the top.
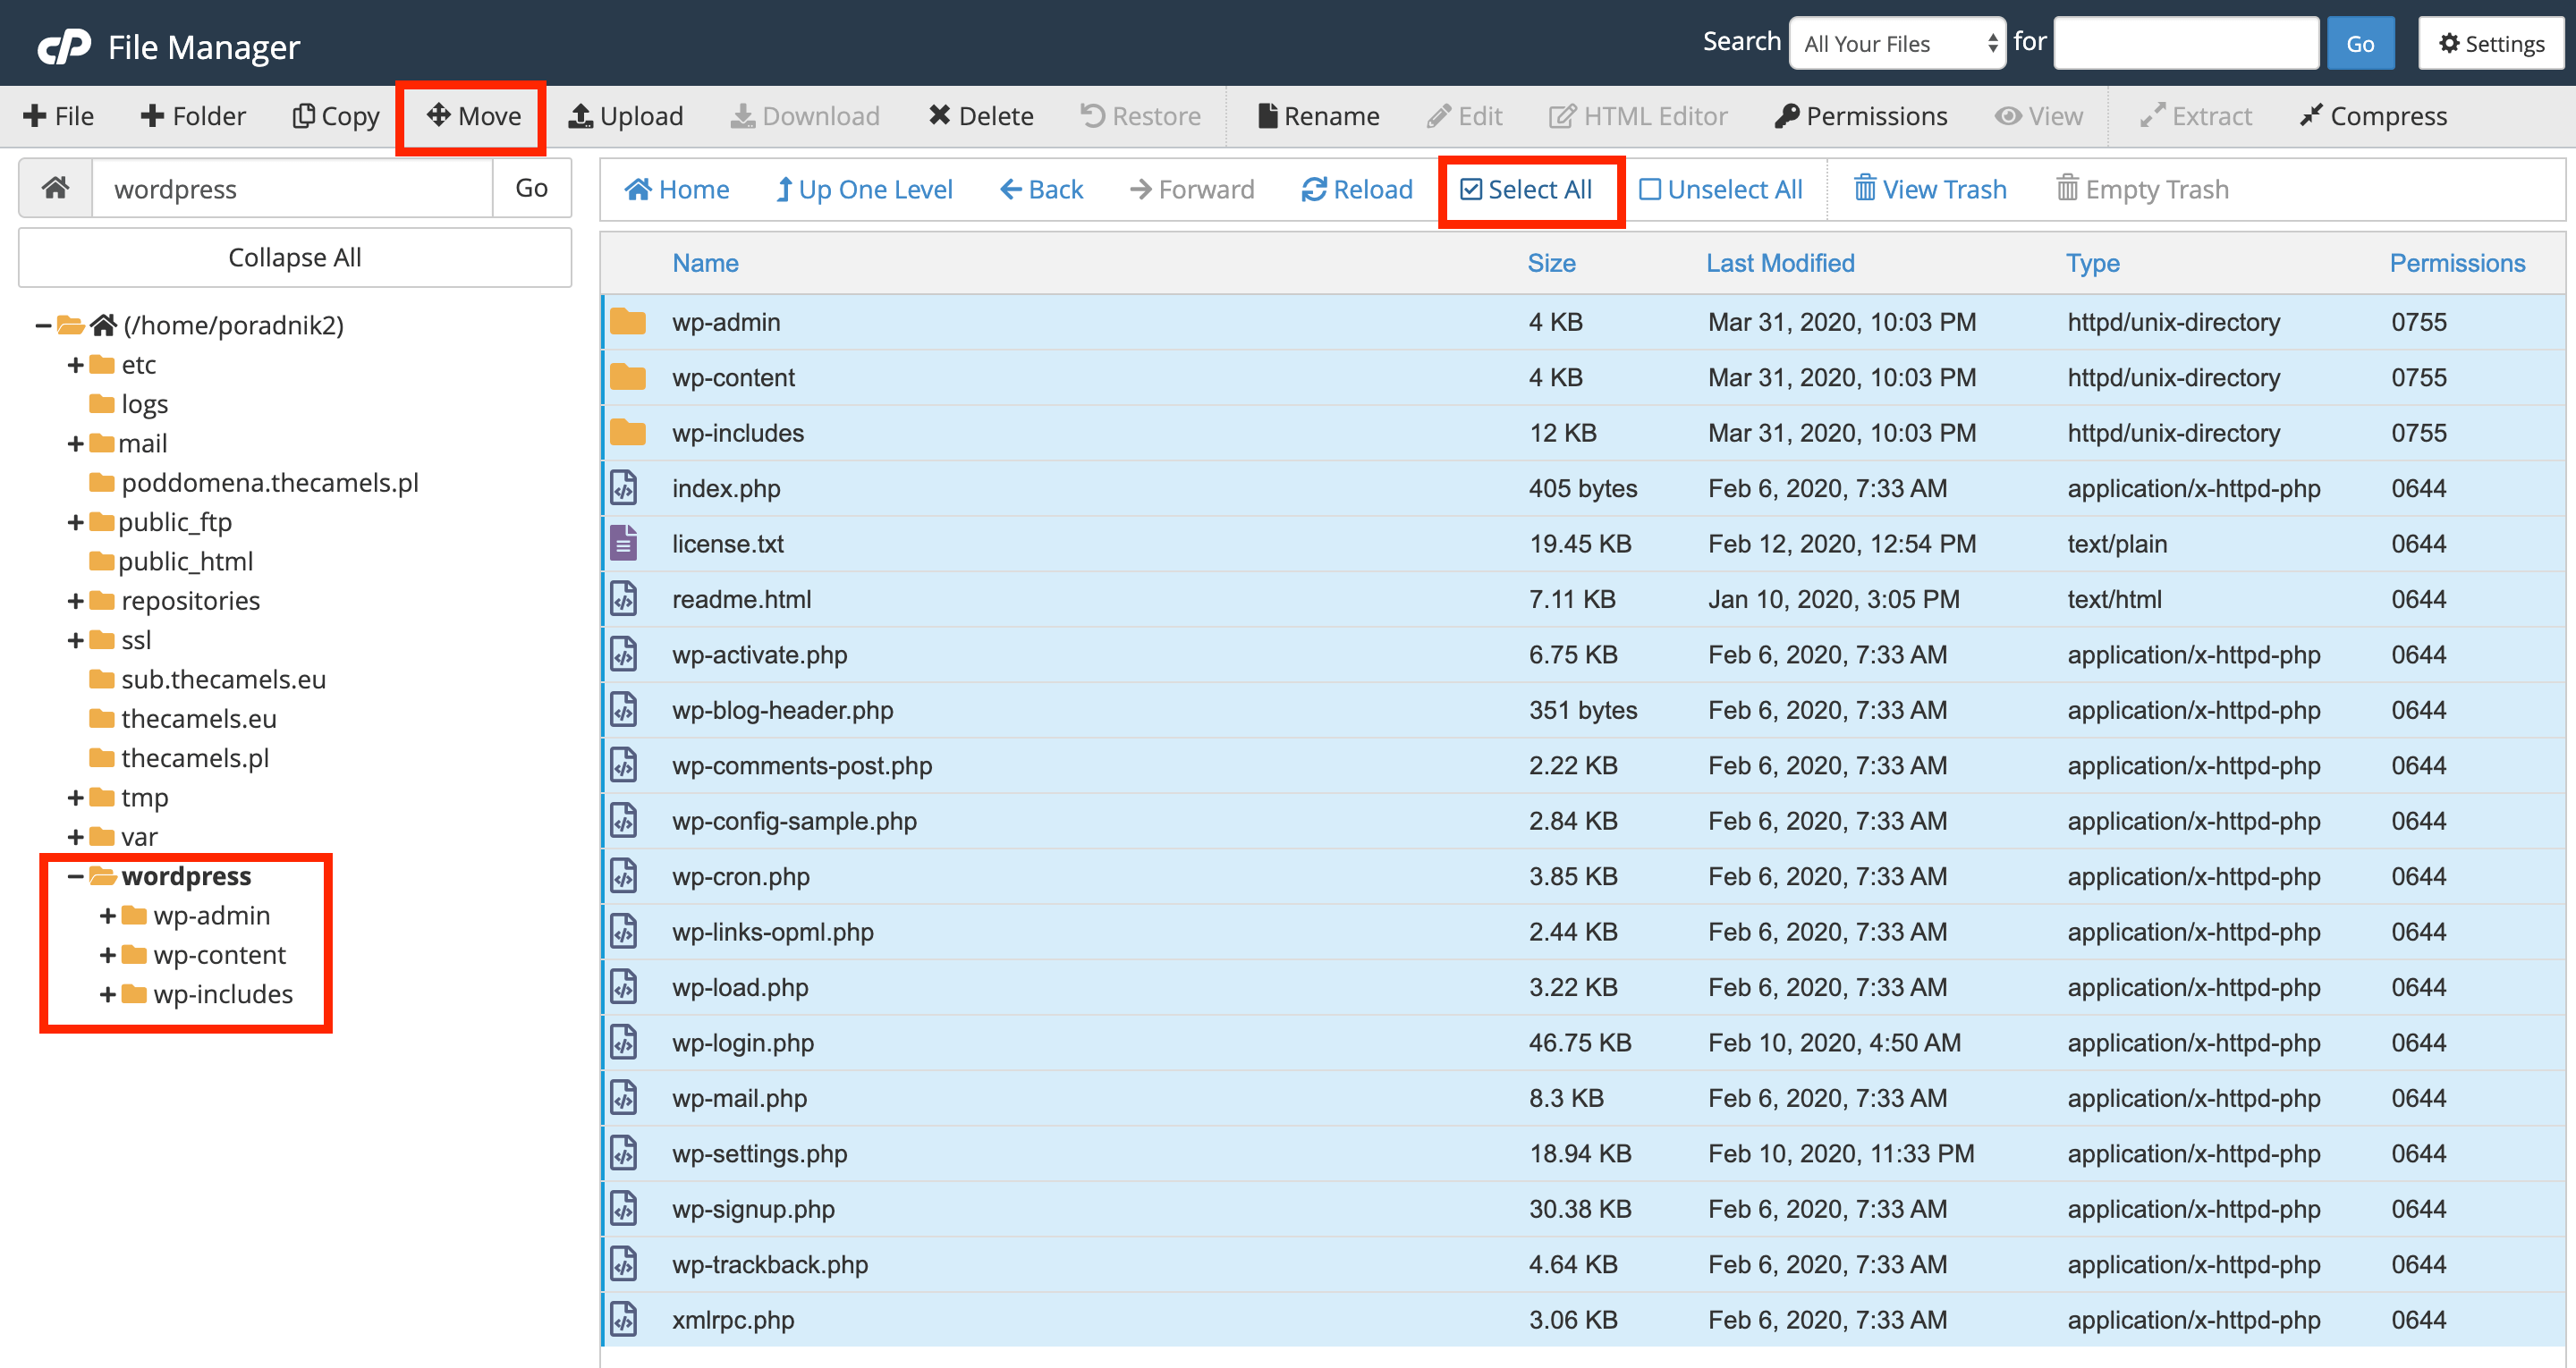
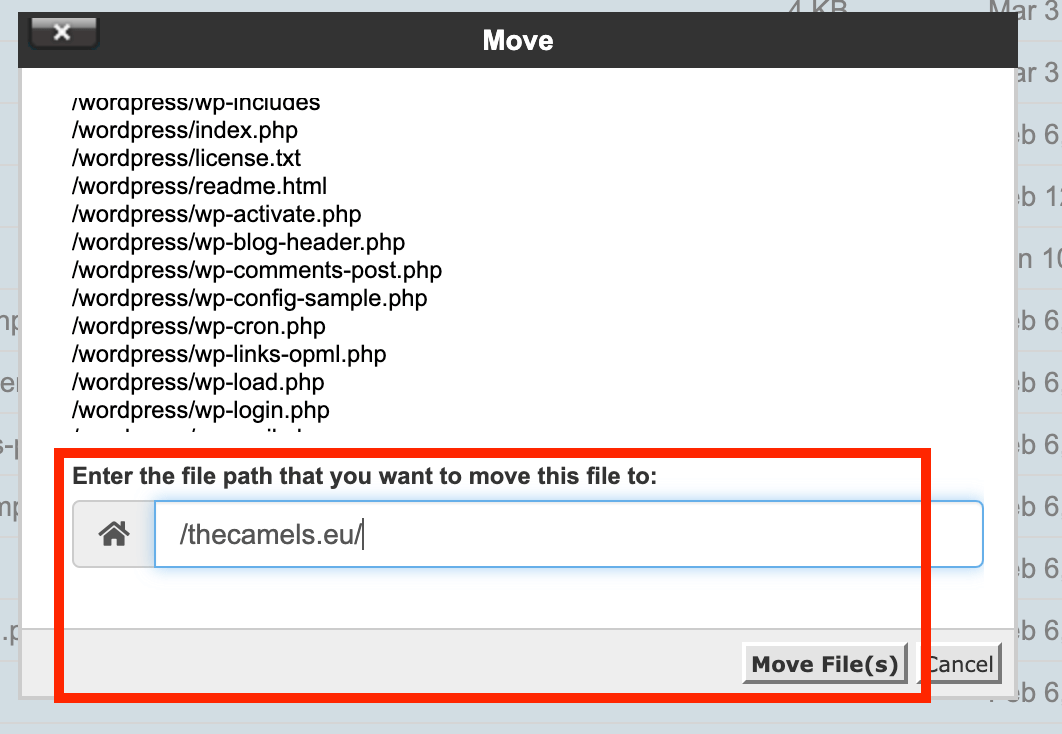
- Go to the new wordpress directory. Mark all files and folders with the "Select all" button, and drag and drop all files to destination folder by holding left mouse button.
- After the transfer we go to the directory where the Wordpress files should be now.
Remove: if present - index.html. It is also worthwhile to remove an empty wordpress directory and a zip pack with the downloaded archive from the home directory.
Note: If you want to move files to another location, you need to specify the path to the selected directory. You should check the path twice, because you can overwrite other files of your sites!
Edit hosts file (optional)
If the domain is not registered or is not directed to our servers, you have to edit the hosts file on your system.
- You will need a hosting IP address. You will find it in the cPanel on the right is Shared IP Address.
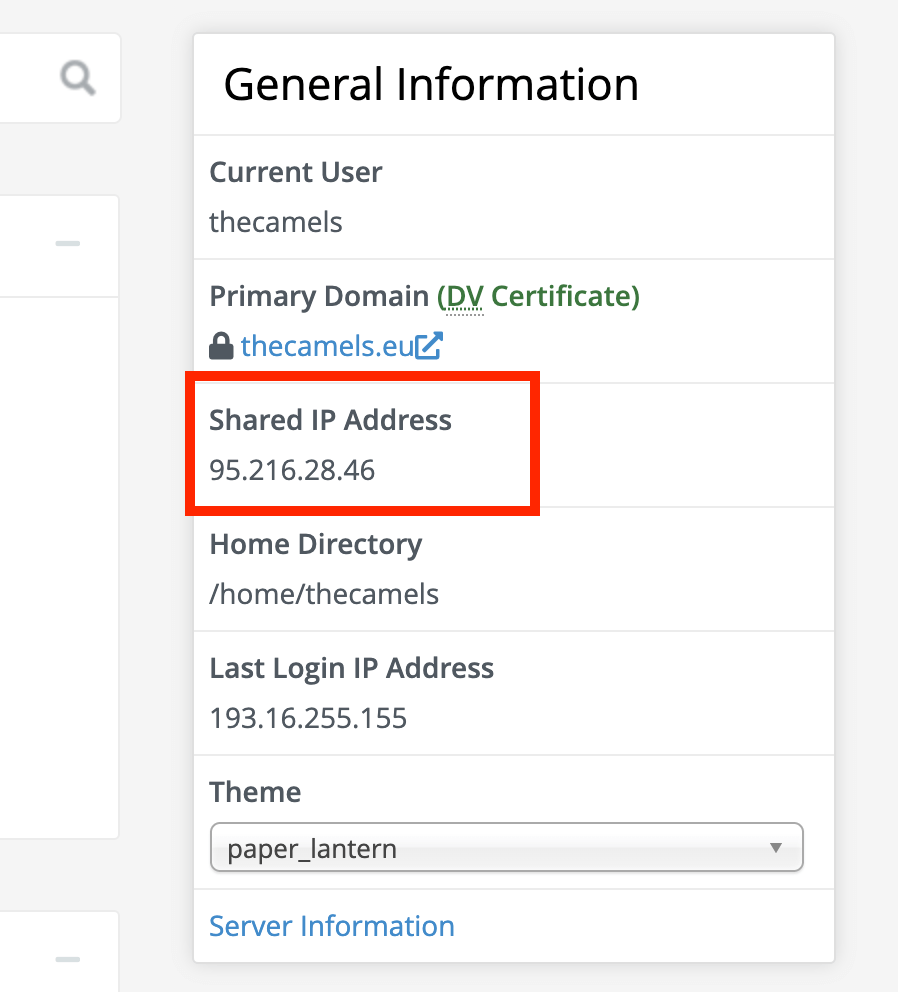
- When you have a server IP, edit the hosts file.
Installation of WordPress
- You have to open the browser in private mode and enter the address of our website in the address bar, e.g. <code>thecamels.pl</code>. A window with the installation of WordPress will open. The first step is to choose the language. Stay with English.
- In the next window you should enter the data into the database, to create a database we recommend using the Database Wizard. After going through the guide, enter:
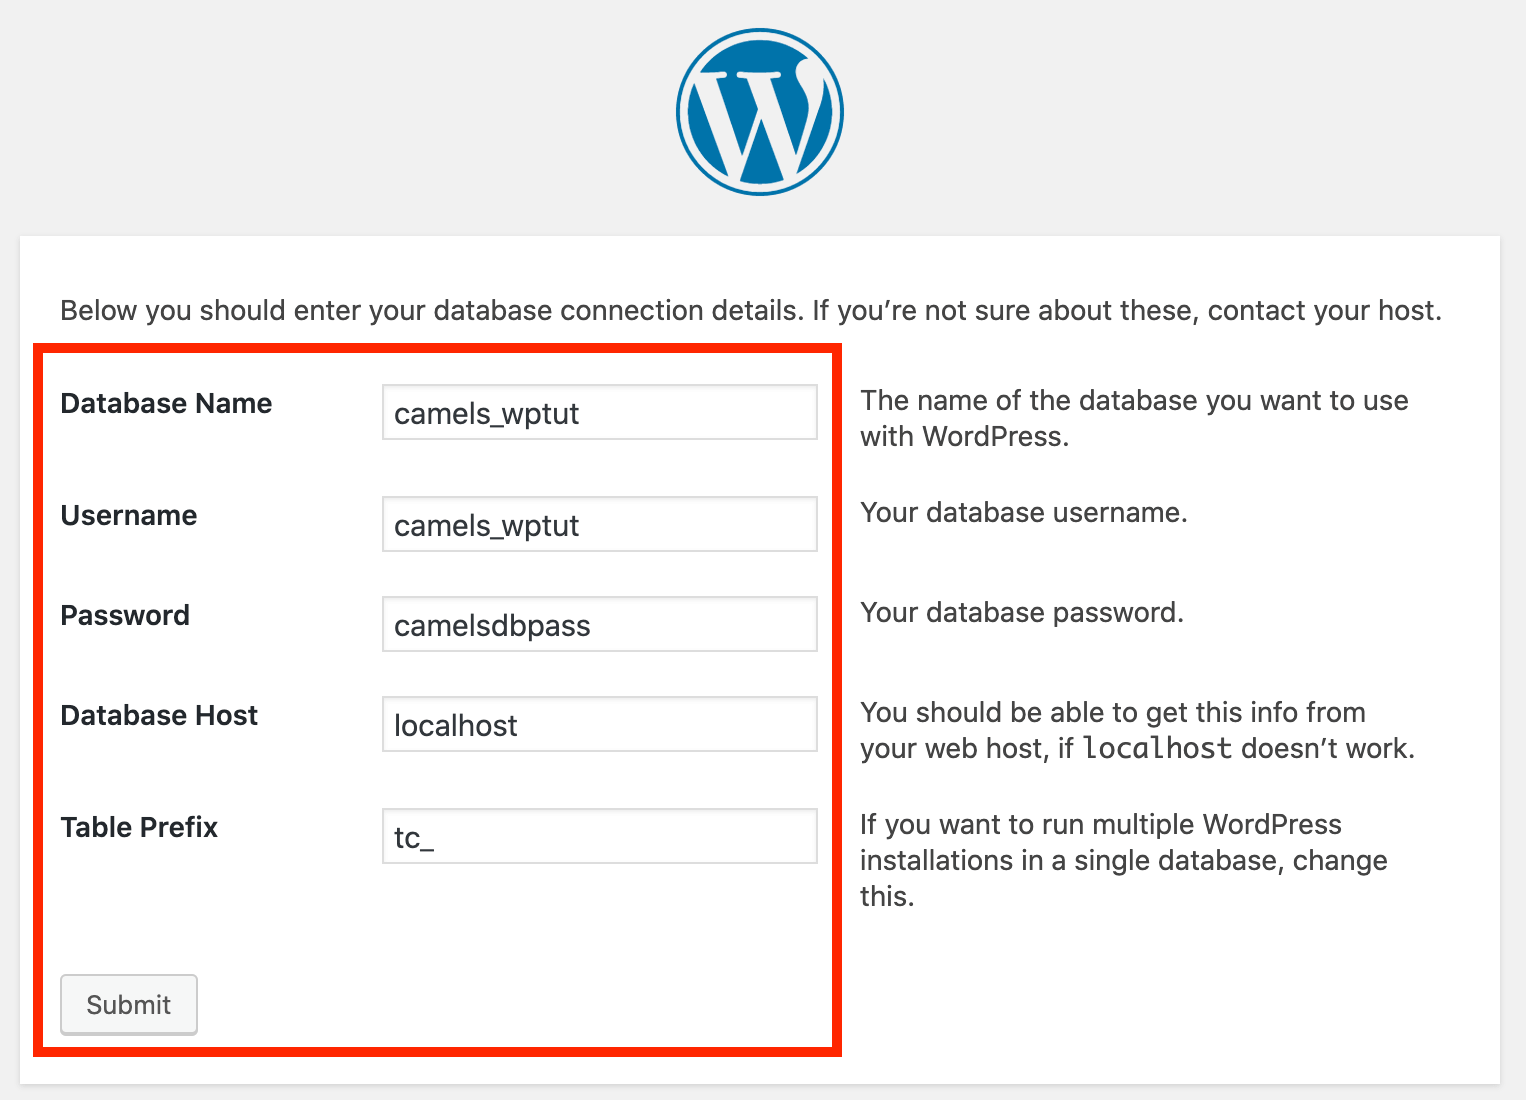
- Database name - a previously created database name,
- Username - is the name of the user we created and assigned to the database,
- Password - the password for the user you specified above,
- Database Host - we keep the localhost. The term localhost itself means that the database is on the same server as the site files,
- Table Prefix - leave default,
- After completing the fields, click "Submit".
- In the last step of the installation, there is a form to be completed:
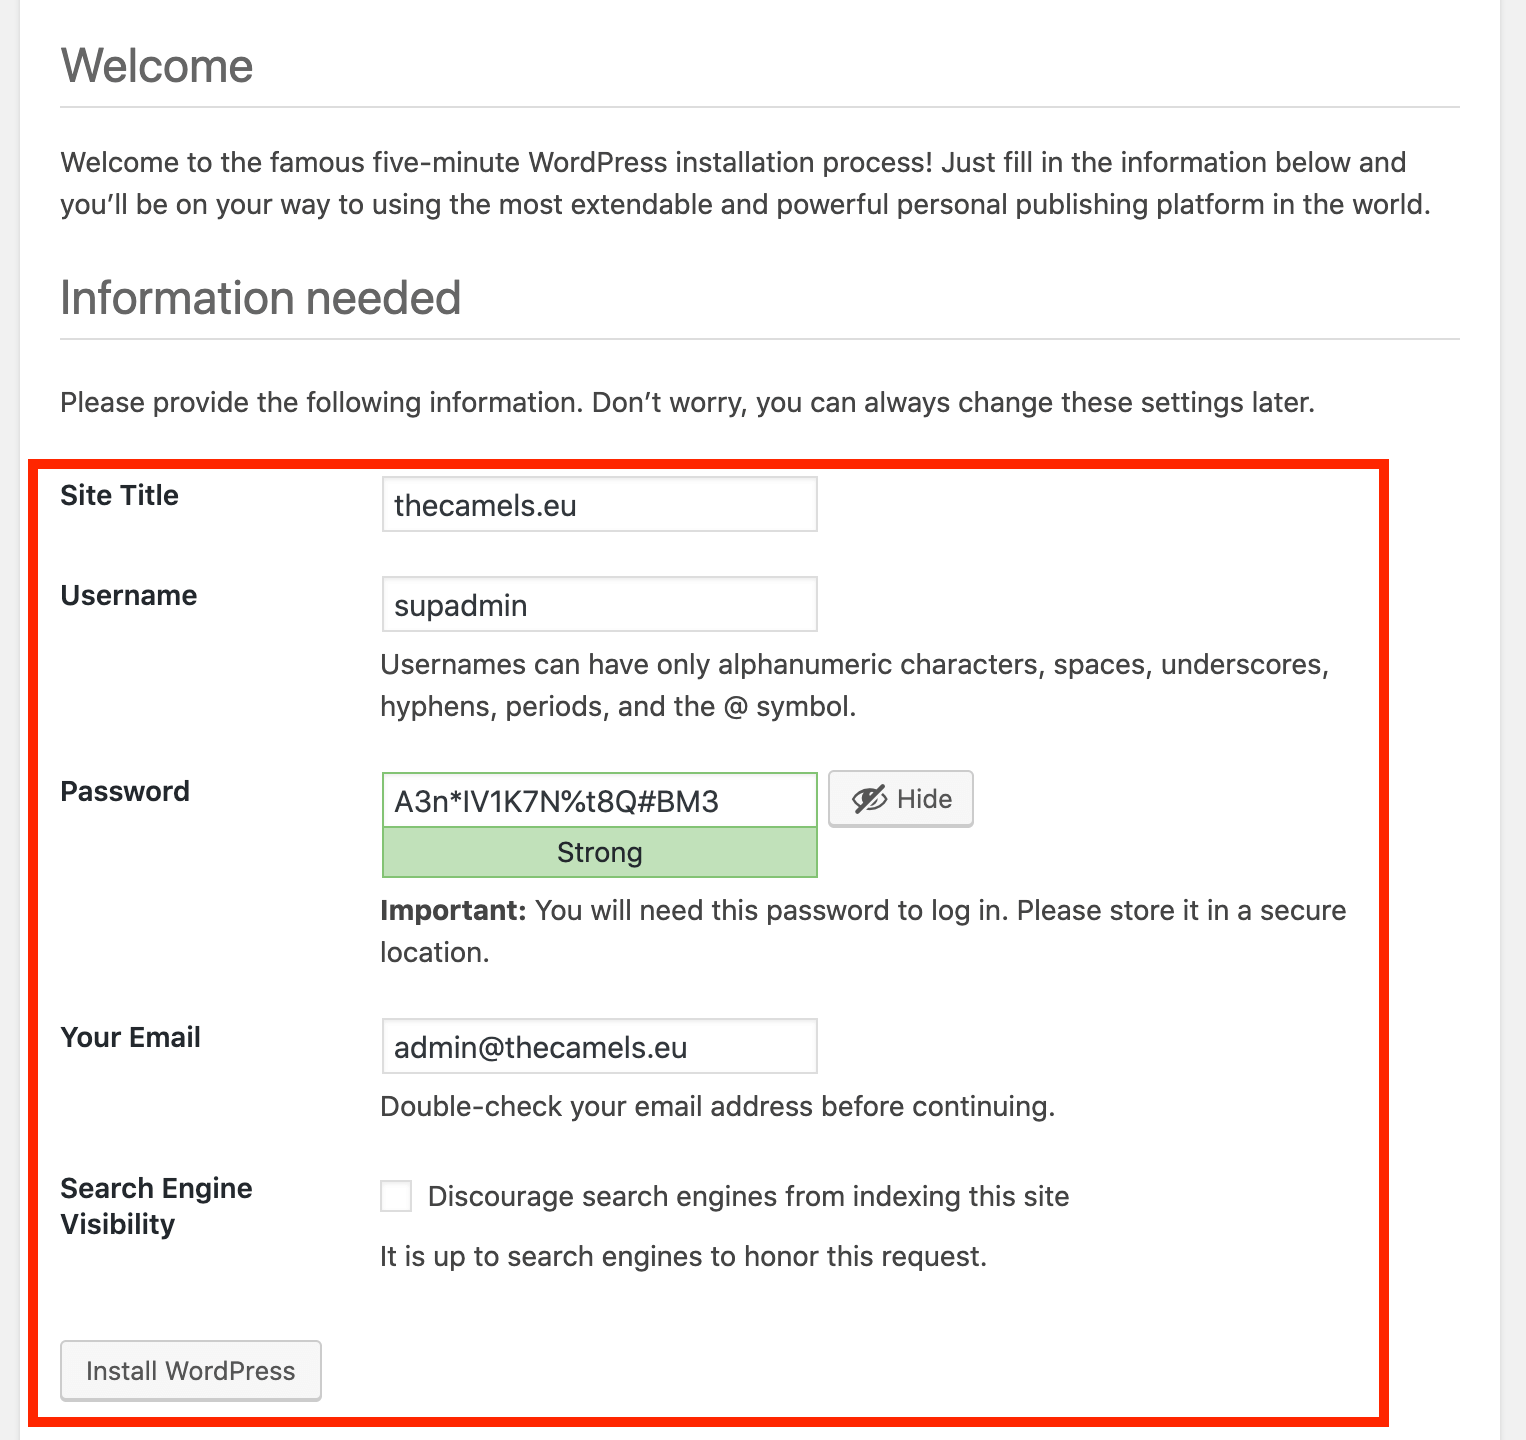
- Site title - the name of the page that will appear on the tab in your browser,
- Username - administrator account name (we do not recommend admin),
- Password- the longer, the better!,
- Your Email - you give the e-mail that you use,
- Search Engine Visibility - check,
- Press "Install WordPress", to finish installation process.

